
I love texture. I love the rich look of saturated colors. But when I can add a dimensional texture to my card, I’m over the moon! Today’s photo/video tutorial will make you feel like you actually have raw silk fabric at your finger tips. Even better? It’s OMBRE! Glue + paper + ink + Water Painters… = gorgeous color and texture.
Pretty, right? I won’t say this technique is ‘easy,’ but it is pretty quick and not nearly the mess that you’d think from looking at the supplies. Plus I’ve got some really excellent tips in the video for keeping your fingers out of the glue and away from the ink.

How to Create the Ombre Faux Silk Background Technique:
- Crumple tissue paper that’s at least 1″ larger than your base layer.
- Add a thin coating of Multipurpose Liquid Adhesive to cover your entire base layer. Working on a Silicone Mat will prevent your paper from sticking to your work surface.
- Partially smooth out the tissue.
- Apply to the glued paper, tapping down to attach in all places.
- Use the Water Painter ***(I love these! Watch the video for tips on loving them, too). Wet the entire page with water by brushing back and forth.
- Use the coordinating Ink Refill to add 3 dots of color at the dark end of the ombre paper.
- Using the Water Painter (again, this is the perfect tool for this technique), brush back and forth and gradually move the ink up towards the lighter end. Again, extra tips for this in the video tutorial below.
- Continue to move ink from the darker end to the lighter end until desired depth of color is achieved. Let dry or speed drying with a Heat Tool.

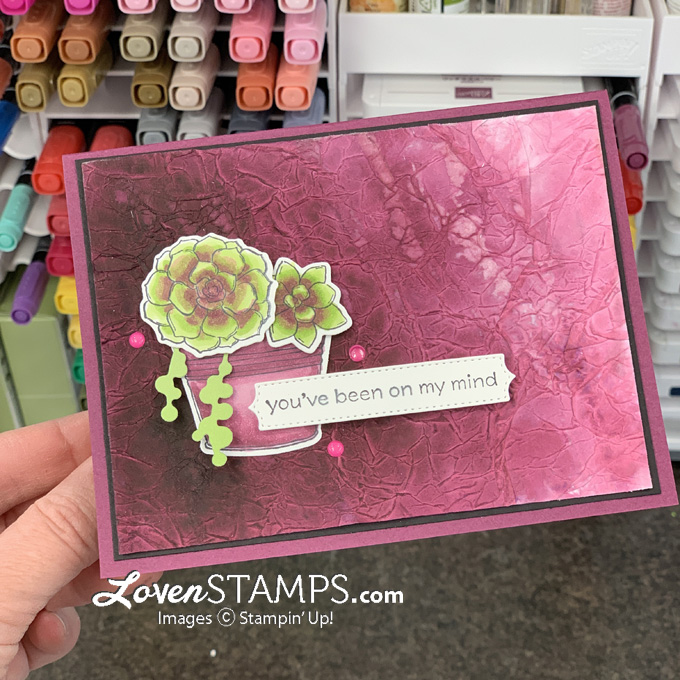
Decorate as desired! I used the Simply Succulents Bundle (stamps and dies) because the rich purple is perfect to complement the purple and greens in some of the succulent varieties. Lots of fun for coloring with the Stampin’ Blends Markers to match – and again, more tips for those in the video tutorial.
Ready to see the video tutorial? I’ll show you how to create this rich Ombre Faux Silk background, plus some tips on the Mini Stampin Cut & Emboss Machine, Stampin’ Blends and more!
View below or use the link to view directly on my LovenStamps YouTube channel. Don’t forget to subscribe while you’re there!
Ready to stamp?
Supplies for this project can be found with Meg’s 1-Click Add-to-Cart Shopping Link: https://s.tamp.in/2ljCAa
Don’t forget that your order can qualify you for LovenStamps Perks Points and LovenStamps Card Kits “To Go” when you use a hostess code! Check out the details on earning Perks Points and Card Kits with your order. February Tutorials are available through February 28!!

Supplies you’ll want for stamping at home (click images to order online):


 Designer Series Paper")


Happy Stamping!
 To Order Stampin’ Up! Products On-Line 24/7, CLICK HERE!

Shop the January-June and Annual Stampin’ Up! Catalogs, new suites and collections are available now!
- Want a little? Place an order!
- When you order: use February Hostess Code (RHYS3AXU). Earn 1 LovenStamps Perks Point for every $25 you order online, plus LovenStamps Card Kits “To Go” with an order of $50 or more!
- Want a lot? Host a party – or be your own hostess with a large online order! (Stampin’ Rewards begin at $150 in orders – don’t use the hostess code for orders over $150, since you’ll pick your own Rewards with your order)
- Want it ALL? Join my LovenStampfuls demonstrator family

Paper Pumpkin March 2020: Here’s to You!
- Kit contains enough supplies to create 8 cards—4 each of 2 designs—and coordinating envelopes. The kit’s contents include printed card bases, die-cut paper pieces, embellishments, adhesive, an exclusive stamp set and more!
- Available with a Paper Pumpkin subscription by March 10.
- Sign up with a prepaid Paper Pumpkin code or subscribe for monthly kits.
- Learn more about Paper Pumpkin!