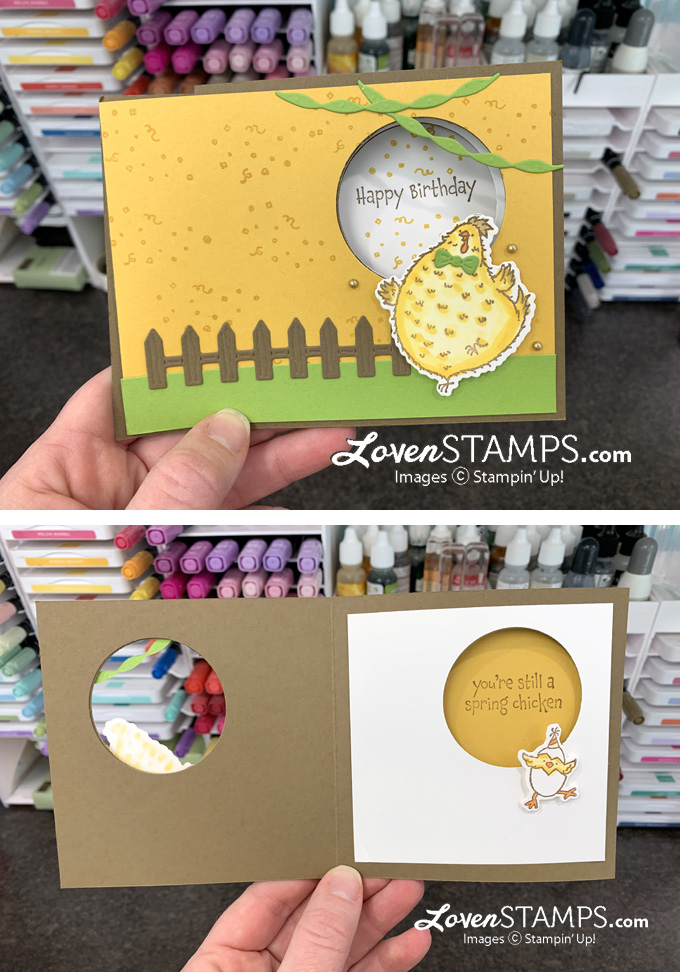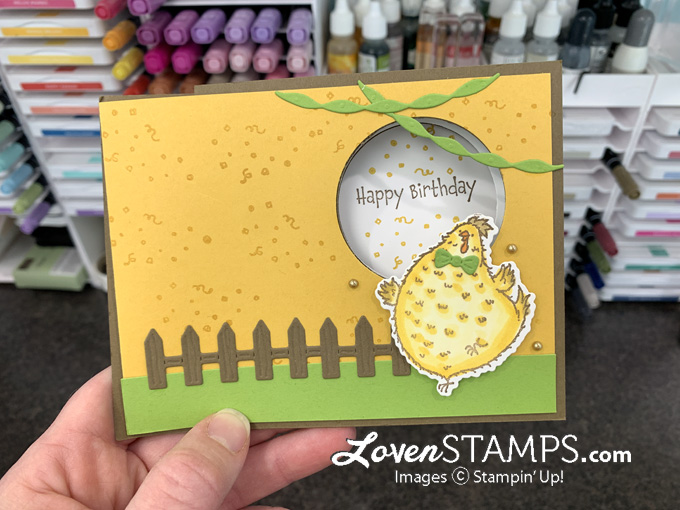
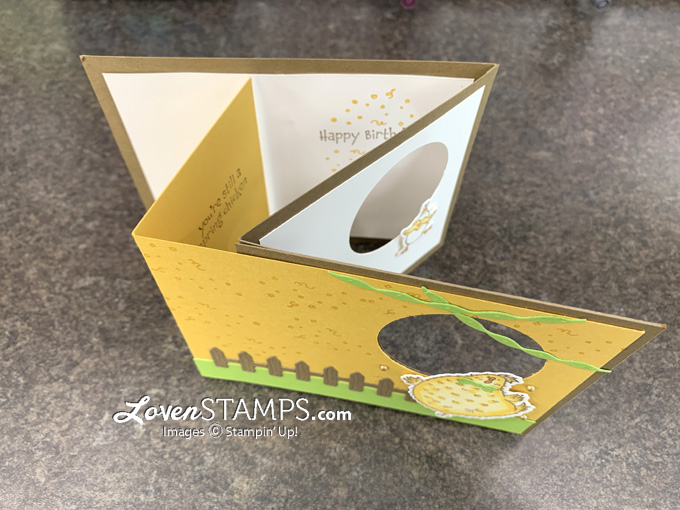
Today’s card is one that you’ll have a hard time putting down. The Peek-A-Boo Flip Card has a hidden panel that swings over to change the greeting when it’s opened. And watching that peek-a-boo window is mesmerizing… I’m not responsible for your time lost in marveling over this fun card layout! 😆
This month’s LovenStamps Card Tutorials and Card Kits “To Go” feature the fabulous and fun Hey Birthday Chick stamp set – which was in the January – June Mini Catalog but came out fresh on February 2 with the announcement of coordinating dies (check out all the wonderful chicken stamp sets and dies).
There are a lot of steps to making this card, but I promise that it’s worth it. You’re going to LOVE the design, which I’ve updated to allow for a prettier layer on the front of the card. And don’t worry – I’ve got you covered with a walkthrough tutorial on how to make the Peek-A-Boo Flip Card. I’ll be sharing it live online at 9:30 am CT this morning on the LovenStamps Facebook page.
If you’d like a printable PDF tutorial for this card, it’s available for free with any size order in my online store during the month of February. Just place your order, make sure to select me (Meg Loven, IL) as your demonstrator, and I’ll get the tutorial to you by email!
How to Make the Peek-A-Boo Flip Card
First cut your paper to size:
- Granny Apple Green: ¾” x 5 ¼”, scrap for banner and bow tie die cuts
- Basic White: ¼ sheet for die cuts, 3 ¾” x 3 ¾” for middle layer, 3 ¾” x 5” for back inside layer
- Soft Suede: 4 ¼” x 8 ½” scored at 4 ¼”; 4 ¼” x 5 ¾” scored at 5 ½”; scrap for fence die cut
- Bumblebee: 4” x 8” scored at 5 ¼”
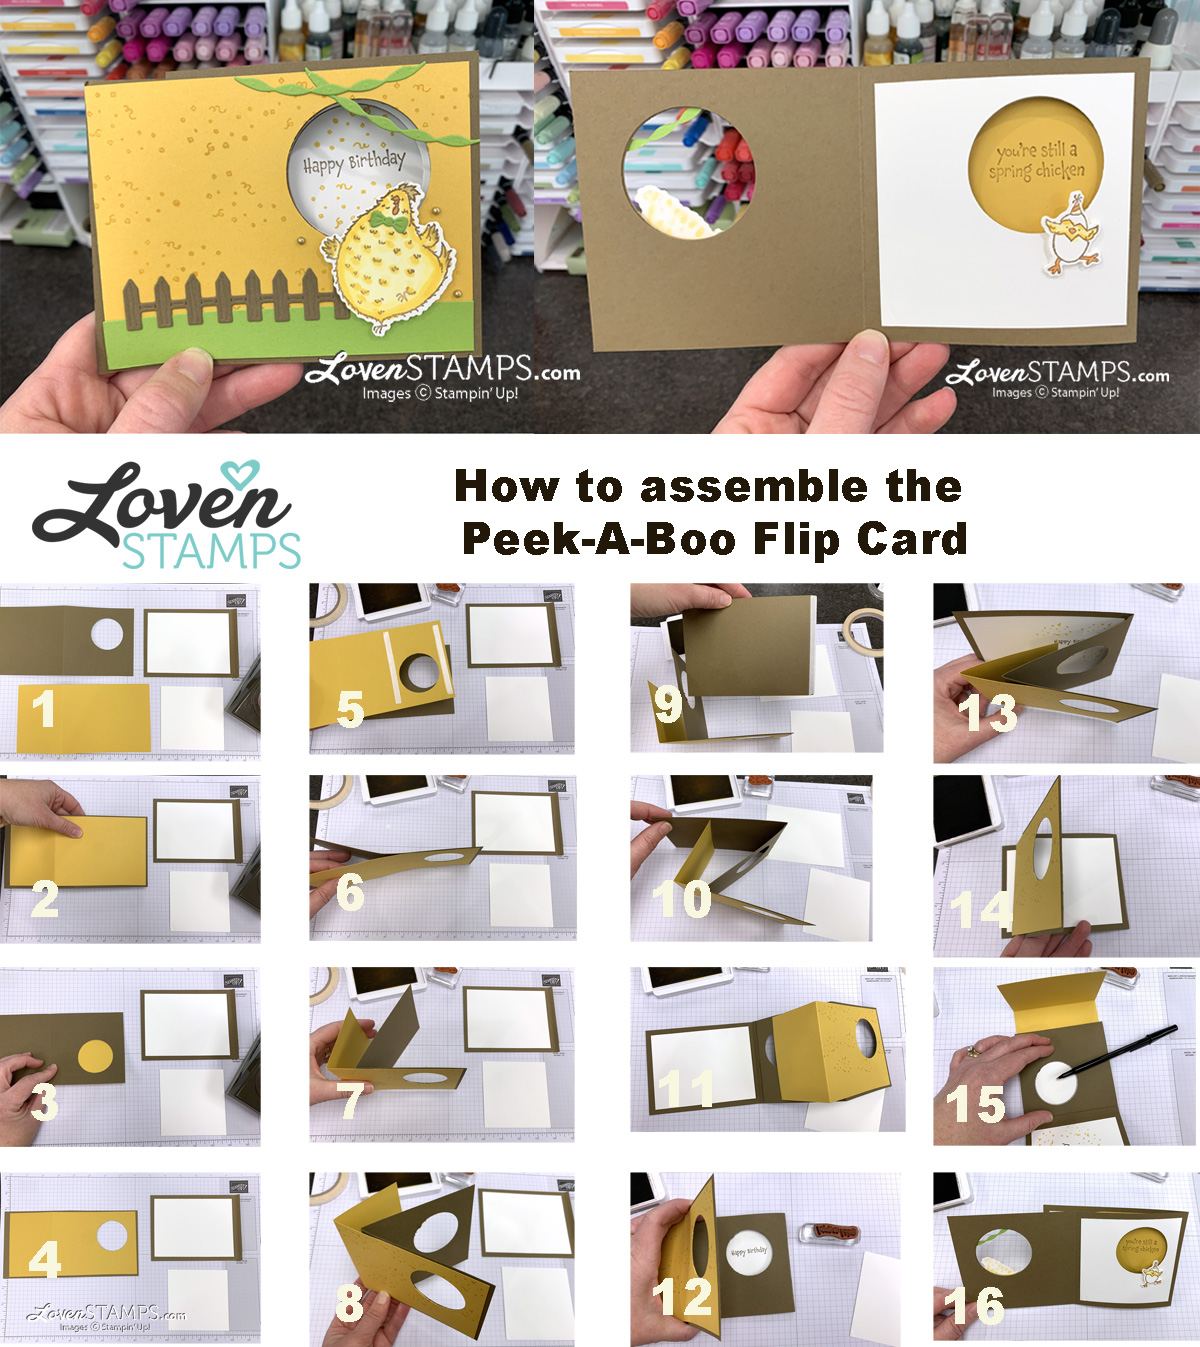
INSTRUCTIONS
- Cut and score layers as directed above in supply list. Lay out pieces as shown. Punch 2” hole at upper right corner of the 4 ¼” x 8 ½” piece.
- Position Bumblebee layer over Soft Suede layer with 1/8” border all around the card front (left edge won’t be the same).
- Holding layers together, use pen to trace circle hole onto Bumblebee.
- Punch matching hole in Bumblebee layer.
- Using two strips of Tear N Tape or Seal+, adhere Bumblebee layer to Soft Suede layer only as shown.
- Layers should be connected only around the 2” hole.
- Fold left-hand sides of Bumblee and Soft Suede cardstock as shown.
- Close layers flat, then trace 2” hole onto inner Soft Suede layer. Punch to match and set aside.
- Add strip of Tear N Tape or Seal+ along ¼” flap of the 4 ¼” x 5 ¾” Soft Suede piece. Remove backing paper and fold any excess adhesive back onto itself.
- Adhere 4 ¼” x 5 ¾” layer to back edge of center Soft Suede layer as shown. ¼” flap should go on the back side of the middle layer.
- Opening card ‘guts’ to the right, position layer of Basic White inside card (3 ¾” x 5”).
- Close pieces and stamp through the middle hole with “happy birthday’ image. Open card again and add stamped confetti with Bumblebee ink.
- Card layers should now close as shown.
- To add Basic White layer on inside panel, position 3 ¾” x 3 ¾” Basic White as shown.
- Hold layers together and flip to back side. Trace and punch 2” hole to match.
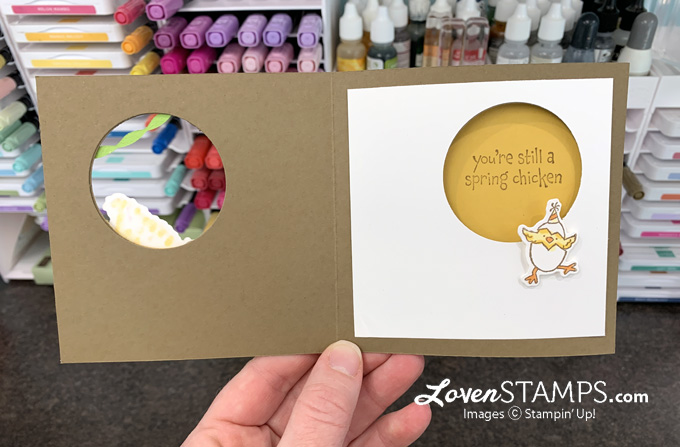
- Adhere Basic White layer ‘inside’ card. Stamp “spring chicken” greeting through hole onto Bumblebee cardstock. Stamp and die cut chick in shell, then add with Stampin Dimensional.
I promise that you could do this with fewer individual photos, but I figured more is better when you’re trying this card for the first time. So be sure to pin the graphic above (there’s a little ‘pin it’ button at the top left) so that you’ll remember where to find these directions.
Ready for the video tutorial? I’ll walk you through the steps on making your own Spring Chicken Peek-A-Boo Flip Card. See you at 9:30 am CT on Facebook, or view the repost below on YouTube.
View below or use the link to view directly on my LovenStamps YouTube channel. Don’t forget to subscribe while you’re there!
Ready to stamp?
Don’t forget that your order can qualify you for LovenStamps Perks Points and LovenStamps Card Kits “To Go” when you use a hostess code! Check out the details on earning Perks Points and Card Kits with your order.

Products You’ll Want for Stamping at Home (click images to order online or use 1-click add-to-cart https://s.tamp.in/HXjZ4D):

")


 Circle Punch")


Happy Stamping!
 To Order Stampin’ Up! Products On-Line 24/7, CLICK HERE!

Shop the January-June and Annual Stampin’ Up! Catalogs, new suites and collections are available now!
- Want a little? Place an order!
- When you order: use February Hostess Code (RHYS3AXU). Earn 1 LovenStamps Perks Point for every $25 you order online, plus LovenStamps Card Kits “To Go” with an order of $50 or more!
- Want a lot? Host a party – or be your own hostess with a large online order! (Stampin’ Rewards begin at $150 in orders – don’t use the hostess code for orders over $150, since you’ll pick your own Rewards with your order)
- Want it ALL? Join my LovenStampfuls demonstrator family

Paper Pumpkin February 2020: Beary Comforting
- Available with a Paper Pumpkin subscription by February 10.
- Includes stamps, ink, embellishments and paper to create 9 cards and envelopes.
- Sign up with a prepaid Paper Pumpkin code or subscribe for monthly kits.
- Learn more about Paper Pumpkin!