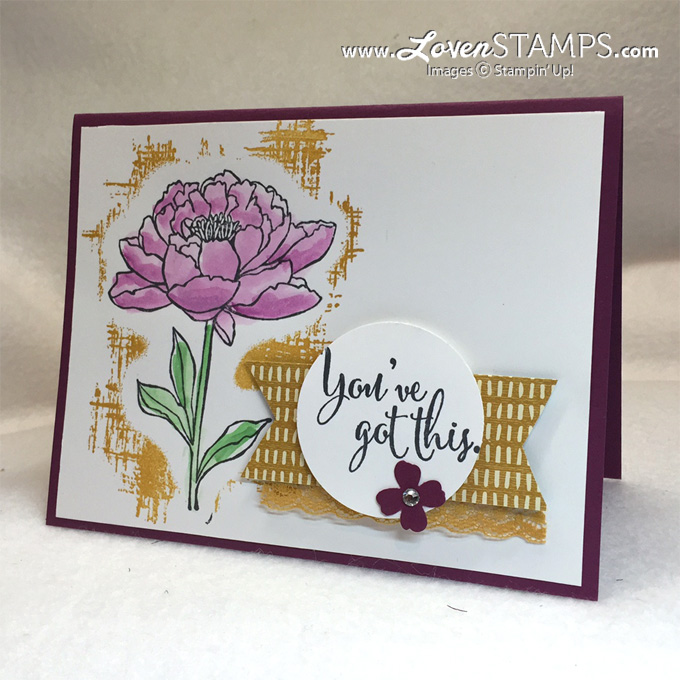
Have you seen the new You’ve Got This stamp set yet? I’m in love with the gorgeous flower in this set. I’d call it a peony – what do you think? The stamp set also has a fabulous background image…so fabulous that I’d actually buy the set just for the background! But using them both together? What a great combination.
The problem I found was that I didn’t really want to cut out the flower and add it as another layer. I’m just not usually a fussy-cutter. But I didn’t want the hash background to cover the flower. Solution? Pretty easy! Make a mask!
Masking Technique Instructions
- Stamp the main image on scratch paper – a post-it note works perfectly.
- Cut around the image – either tightly or with a small border (as used to create the peony mask for the pictured project).
- Stamp the main image on the project. Cover with mask (see how the post-it note comes in handy?).
- Stamp background over the top of the mask (post-it note), then remove the mask.
See how it works? Very cool technique for adding leaves to a flower, or layering flowers together so they look like a bouquet instead of a single bloom. And on this card, masking makes the image pop out of the background – without all the fussy cutting!
Want to check out a few other Masking Technique project ideas? Here are a few from my blog!
Product List


Happy Stamping!
 To Order Stampin’ Up! Products On-Line 24/7, CLICK HERE!
 Stamps in the Mail Club with Meg
Sign up today for your July Kit!
Includes the Bountiful Border stamp set, New 2015-2017 In Color Marker Set, plus supplies for making 4 fabulous projects!